Inquiry Workflows
You can use Inquiry workflows to define rules for inquiry routing that best suit your organization's needs. With a custom inquiry form and conditional nodes in the inquiry workflow builder, you can control exactly how inquiries flow from one user to another. Want one inquiry to go to a user's direct manager, but another type of inquiry to proceed directly to an admin? Using the form builder and conditional nodes, you can do just that.
To learn more about using Inquiry Workflows, check out this course on the Using Inquiry Management in Incentives.
Creating an inquiry workflow
To create rules for routing inquiries through Workflow Manager, you must first create an inquiry workflow. You can have as many draft workflow inquiries as you need. You can have multiple running inquiry workflows, but you cannot assign more than one inquiry workflow to the same report. When you stop an inquiry workflow, it becomes archived and no new inquiries can be made, but any open inquiries can still be worked on until they are closed.
From the Workflow module click Create and then select .
Type a name for your inquiry workflow and then click .
Tip
You can change the name later by clicking the more options menu (...) and then clicking the icon
 .
.
After you create an inquiry workflow, you can click the name to start editing the inquiry workflow.
Configuring the inquiry form
Before you can run your inquiry, you must configure the inquiry form that Sales Portal users will use when they create new inquiries. All inquiry forms must have a title and message. All other elements of the form can be customized.
Tip
Even if you want to use the default form, you must save the form before you can run the inquiry workflow.
Click the Inquiry form tab.
Select any object in the form to edit it.
Note
Every form must have a field label, field ID, and example text. You can customize the labels for these fields, but they are always required and the parameters will remain as subject and message.
To add new objects to the form, click the icon
 and then select the type of object you want to add.
Configure each object in the form to meet your needs. You can also configure dynamic form fields in this step.
When adding a text field, enter a field label, field ID, and example text. You also have the option to add help text and template options.
To add a template option, enter text and click on the add icon
 .
.To delete a template option, click on the subtract icon
 .
.To reorder objects and template options in the form, hover over the object you want to move and then drag and drop the object to its new location.
Click .
Configuring Dynamic Form Fields
Dynamic form fields enable Inquiry forms to render form fields based on values entered by the inquiry submitter. They provide a more guided and relevant form experience by giving you the ability to build Inquiry forms that would respond to information selected by a payee. Here's how you can set up dynamic form fields:
The view on
 and view off
  icons on each field show you which form fields are currently visible and those that are not.
Click on a form field to edit.
From the Content tab you can edit different components of the field. For example, you can make the object field required.
To delete the field, click Delete field.
From the Visibility tab under the Default visibility state you can select to show or hide the field and allow or disallow the user to edit the field.
Using Visibility filters you can set up filters to determine when the visibility state will change for the field.
Click Add filter.
Select the logic for how you want the outcomes for the field to apply and for when the following conditions are met.
Enter a Filter name.
Enter a Description.
Click Done.
Click Save on the Inquiry form.
Click Preview to see a preview of your form.
Adding swimlanes
Before you can create routing rules for an inquiry, you must first add swimlanes to the workflow overview and choose which users are in those swimlanes.
By default, there is always an Inquiry Submitter swimlane. This is the user who created the new inquiry.
Click .
Type a name and description for the swimlane.
Under the Types tab, select whether the swimlane will include payees (Sales Portal users) or admin users.
If you are creating an admin swimlane, follow these steps:
Under the Admins tab, select the checkbox for each admin that you want to include in that swimlane.
If you are creating a payee swimlane, follow these steps:
Under the Data sources tab, choose a data source that contains the payee IDs for the users you want to include in that swimlane.
Tip
To define restrictions based on the payee who submitted the inquiry, search for the
Form Initiatortable.Under the Restrictions tab, add restrictions that defines the payees that you want to include in that swimlane.
Click .
When you are done adding swimlanes to the inquiry overview, you can add nodes to any swimlane.
Taking action on an inquiry from within an email
With Fabric - email you can take action on an inquiry from within an email.
Select the inquiry.
Hover over the swimlane that is connected to the admin's email.
Click Edit
.Click on the Admins tab.
Select the email addresses to whom the emails will be sent.
Click Save.
On the swimlane, click on the node where you want to create actions. The created actions will be the options shown in the email.
Click on the Action notification tab to customize the look of the email notification.
Click Save.
Once an inquiry has been submitted, it will trigger an email to be sent.
On the email, select the action that will be taken. The action can only be submitted once per email.
In Sales Portal, under Notifications, you can see a summary of the action that has been taken.
Note
Taking action on an inquiry from within an email can only be applied to Presenter Adaptive reports.
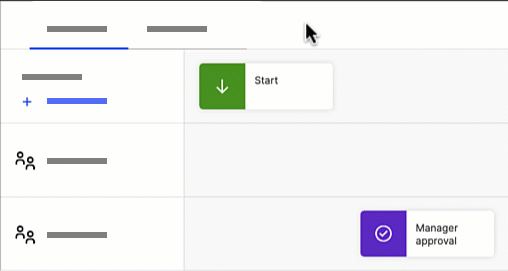
Inquiry Workflow nodes
After you create swimlanes, you can add nodes to the inquiry overview. Nodes define the rules for how an inquiry moves from one stage to another.
When you are done creating all of the nodes that you need, you can connect all of the nodes, including the Start and End nodes, to define the inquiry routing rules.
Adding action nodes
Action nodes let you define which actions users can take on an inquiry, which can be used to route the inquiry to another swimlane. Action nodes also let you define what status an inquiry should be in when it reaches that swimlane. For example, you could set up an action node that allows a user to take actions like Reject or Approve, which, in turn, can route that inquiry to two different swimlanes.
Hover over the column and swimlane where you want to add the node and then click .
Select Action Node as the node type.
Type a name and description for the node and click Save.
Click to add a path. These are the actions that users can take when the inquiry reaches their swimlane.
Click the edit icon
to change the name of the path and then press Enter to save.Add as many action paths as you need and then click .
Under the Expiration tab, select whether to set an expiration date. After the defined date or length of time passes, the inquiry will proceed as if the user chose the action you selected as the Expiration path.
Under the Status tab, select which status the inquiry should be in when it reaches this action node.
Click .
Adding conditional nodes
Conditional nodes are used to create automatic routing rules based on user-entered values in the inquiry form. For example, you can set up a conditional node that routes the inquiry to a different swimlane depending on the category a user selects in the inquiry form.
Hover over the column and swimlane where you want to add the node and then click .
Tip
You can add a conditional node as the first node in the inquiry process. This lets you route inquiries to different groups immediately after the user submits an inquiry.
Select Conditional Node as the node type.
Type a name and description for the node and click Save.
Click to add a path.
Click the edit icon
to change the name of the path and then click .Define the rules for the path you want the inquiry to take using the parameters defined in the inquiry form and then click .
Continue adding as many conditional paths as you need and then click .
Adding auto adjust nodes
Auto adjust nodes let you streamline the approvals and updating process for changes to amounts in reports. If a payee questions an amount in a report on Sales Portal, with just a few clicks you can have a new value approved in Inquiry Management, and the report instantly gets updated for the user in Sales Portal.

To add an auto adjust node to your Inquiry workflow:
Note
Ensure you have already configured your inquiry form before adding your Auto adjust node. See above for help with configuring the inquiry form. It is helpful to ask for information such as the Transaction ID, Requested amount, and Adjustment reason in your inquiry form when setting up an auto adjust node.
Hover over the column and swimlane where you want to add the node and then click + New Node.
Select Auto Adjust Node as the node type.
Type a name and description for the node and click Save.
Select a source table to map the node to.
Match the inquiry form fields to key columns in the source table. This will identify the record that should be updated. Match at least one form field to a source column for updates.
Click Save.
Your auto adjust node is complete. Next follow the steps for connecting nodes to connect your node into the inquiry workflow.
Connecting Inquiry Workflow nodes
After you have added nodes to the inquiry workflow overview, you will connect those nodes to define how the inquiry moves from one node to another. All nodes, and all action and conditional paths, must be connected to other nodes.
Select the node you want to connect.
An arrow will appear on the node that you can use to connect it.
To connect the Start node to the first node of the process, click the Start node and drag the arrow to the node that you want to connect to.
Or select the first node of the process and then click the icon
 from the floating toolbar to automatically connect that node to the Start node.
Connect the rest of the nodes to the workflow process by dragging the arrows from one node to another.
For each Action node with multiple action paths, complete these steps:
Click the Action node, then click and drag the arrow to one of the nodes that you want to connect to.
Select the action path that you want to connect to the node, and click Save.
For each Conditional node with multiple paths, complete these steps:
Click the Conditional node, then click and drag the arrow to one of the nodes that you want to connect to.
Select the path that you want to connect to the node and click .
For each Auto adjust node, complete these steps. All Auto adjust nodes will have multiple paths to connect:
Click the Auto adjust node, then click and drag the arrow to one of the nodes that you want to connect to.
Select the path that you want to connect to the node such as Update success, or Update failure. Click Save.
Connect the last node in the workflow process to the End node to complete the workflow.
Or select the last node of the process and then click the icon
 from the floating toolbar to automatically connect that node to the End node.
Starting an inquiry workflow
Before linking inquiries on a report, it's important to run the inquiry workflow first, and then assign it to relevant Presenter Adaptive reports.
From the Workflows module, create a new, or select an existing inquiry workflow.
In the Workflow Routing tab, click the button
 .
.
Note
Once the workflow is running, you can't make any changes except adding new payees or admins.
Assigning inquiry workflows to a report
You can select which inquiry workflow you want to enable on each report in Portal Access. The inquiry workflow must be running before you can assign it to a report.
In Portal Access, go to the tab.
Under the Inquiry Workflow column, select a running inquiry workflow from the menu to assign to the corresponding report.
Tip
You may need to expand the Presenter Reports and Presenter Adaptive folders to see the list of reports in your model.
Adding payees after a workflow is started
You can include payees in the designated swimlanes even after initiating a workflow. Here’s how you can manage this:
From the Workflows module, start a workflow.
From the toolbar, click the Add workflow payees icon
 , and click Confirm.
From the Data Sources tab, add any additional Data sources that are required to define the payee or payee group that makes up the first swimlane. Any table or calculation with a payee partition as a source can be used.
From the Restrictions tab, define the Restrictions for the payee or payees who make up the form initiator swimlane.
Note
If you used restrictions to define payees, you can schedule the addition of workflow payees in the Scheduler module.
If you are not defining payees by restriction, on the Payees tab, select or clear the column to add or remove payees from the form initiator swimlane.
Click Save.
Setting additional options for inquiries on reports
To allow web users to copy a row from a table in to an inquiry from a Presenter Structured report:
In the admin application, from the Reporting module, select the report you want to enable copying rows.
Click on the data grid in the canvas.
In the Data Grid tab, under Advanced Options, click the Enable Inquiry Copy checkbox.
Click .
To allow web users to copy a row from a table in to an inquiry from a Presenter Adaptive report:
In the admin application, from the Reporting module, select the report you want to enable copying rows.
Click on the table in the canvas.
In the Data tab, under , select the Allow copy row to inquiry checkbox.
Click .
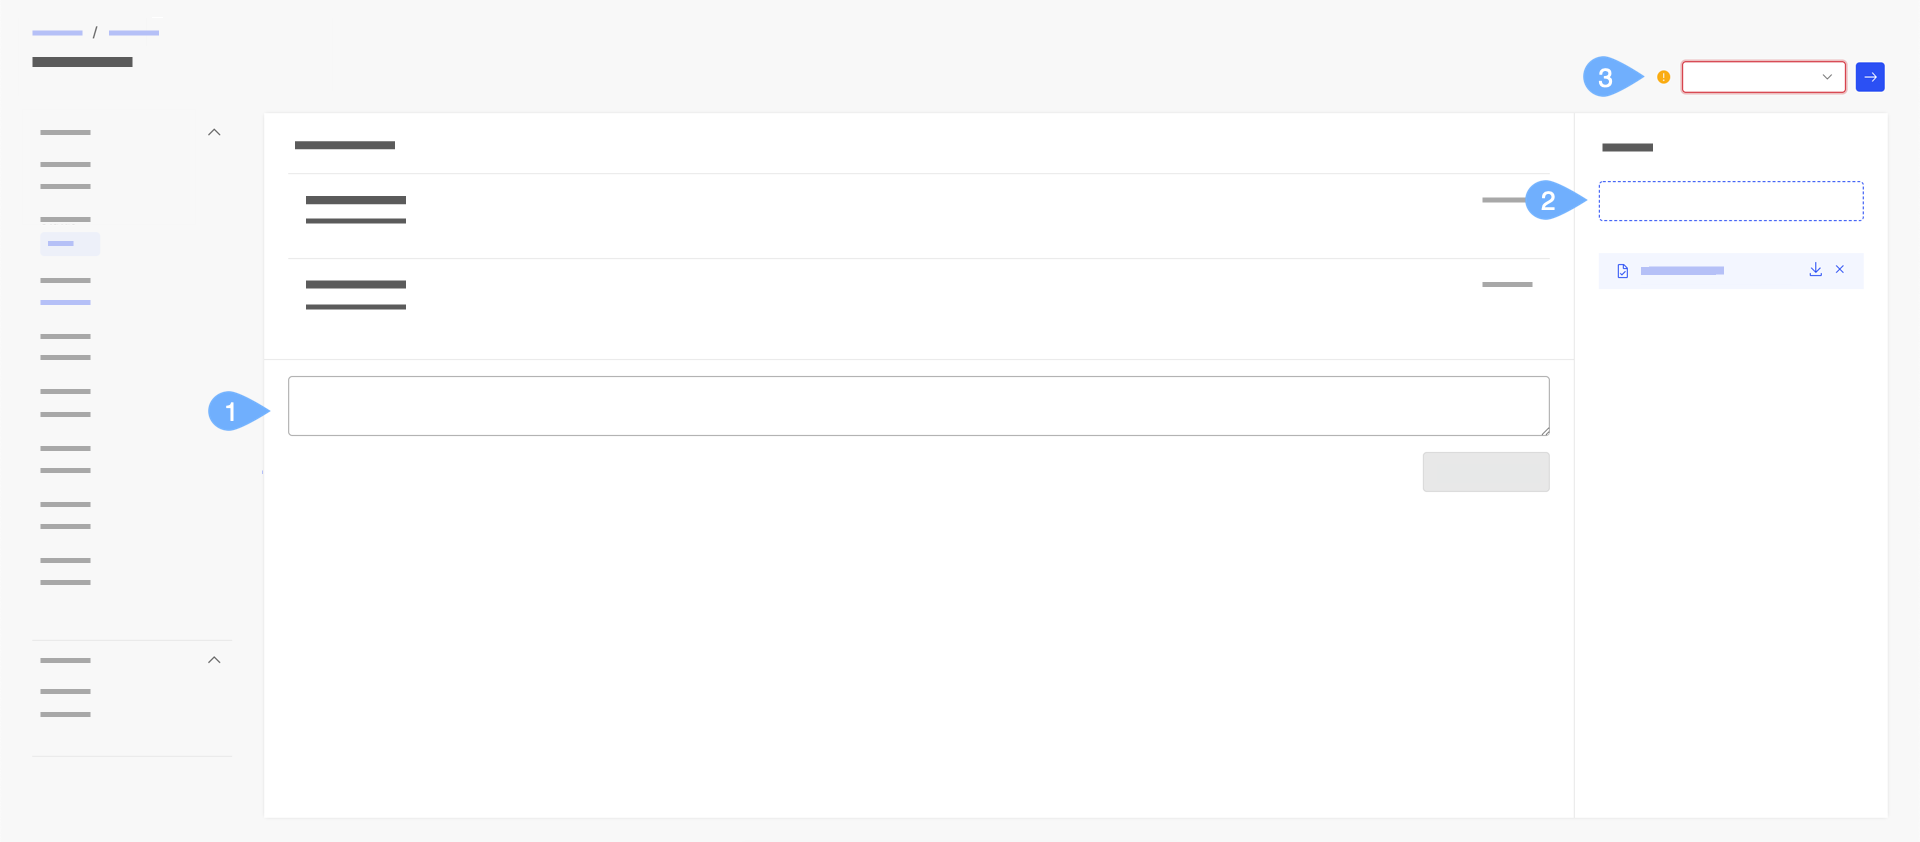
Creating an inquiry in the Sales Portal
Sales Portal users can submit an inquiry if inquiries are enabled for that report.
From a report in the Sales Portal, click the icon
 .
.Fill in all of the required fields, and any optional fields in the inquiry form. Users must always fill in the Subject and Message fields.
Attach documentation to support the inquiry.
Tip
By default, a screenshot of the report is included as an attachment. This helps whoever is handling the inquiry see the report as it appears to the Sales Portal user. You can remove this attachment by clearing the checkbox with the report name.
Click .
After submitting an inquiry, users can visit the Message Center to view the inquiry. As the inquiry progresses through different stages, web users can see information like which admin owns that inquiry or what status the inquiry is in. Users also receive email and in-app notifications when an inquiry they created is updated.
Inquiry management in the Sales Portal
In the Sales Portal Message Center, users can view their inquiries from the Inquiries tab in the sidebar.
 indicates a new inquiry or an inquiry with unread updates.
 indicates that an action is required on this inquiry.
There are 2 categories for inquiries: My Inquiries and All Inquiries.
My Inquiries shows all inquiries that the user has opened.
All Inquiries shows all inquiries that the user can view or take actions on.
The numbers beside each category indicate the number of inquiries that require an action from the user versus the number of inquiries with unread updates.
Click on any row to view the inquiry details.
Once you click in to an inquiry to view its details, you can perform these actions:
Add a comment.
Add attachments.
Perform an action on the inquiry. This includes reopening a closed inquiry.
Copying table rows to Inquiries for auto-adjustment
In Varicent® Incentives Sales Portalweb users can copy a row of data from a Presenter Adaptive report into an inquiry. The row data becomes populated onto mapped fields on the Inquiry form. Web users can make necessary updates to the Inquiry form fields and submit the updates for approval.
Note
This feature is available only if it is enabled by the administrator.
To copy a row to an Inquiry:
On a data grid, click the Copy icon for the row that you want to copy into an inquiry,
The data on the row is copied into the mapped form fields of the Inquiry.
Tip
You can only copy a single row of data to an Inquiry.
Update the values on the form fields as necessary and submit the Inquiry for approval.